The Evil Daddy
/
Garage
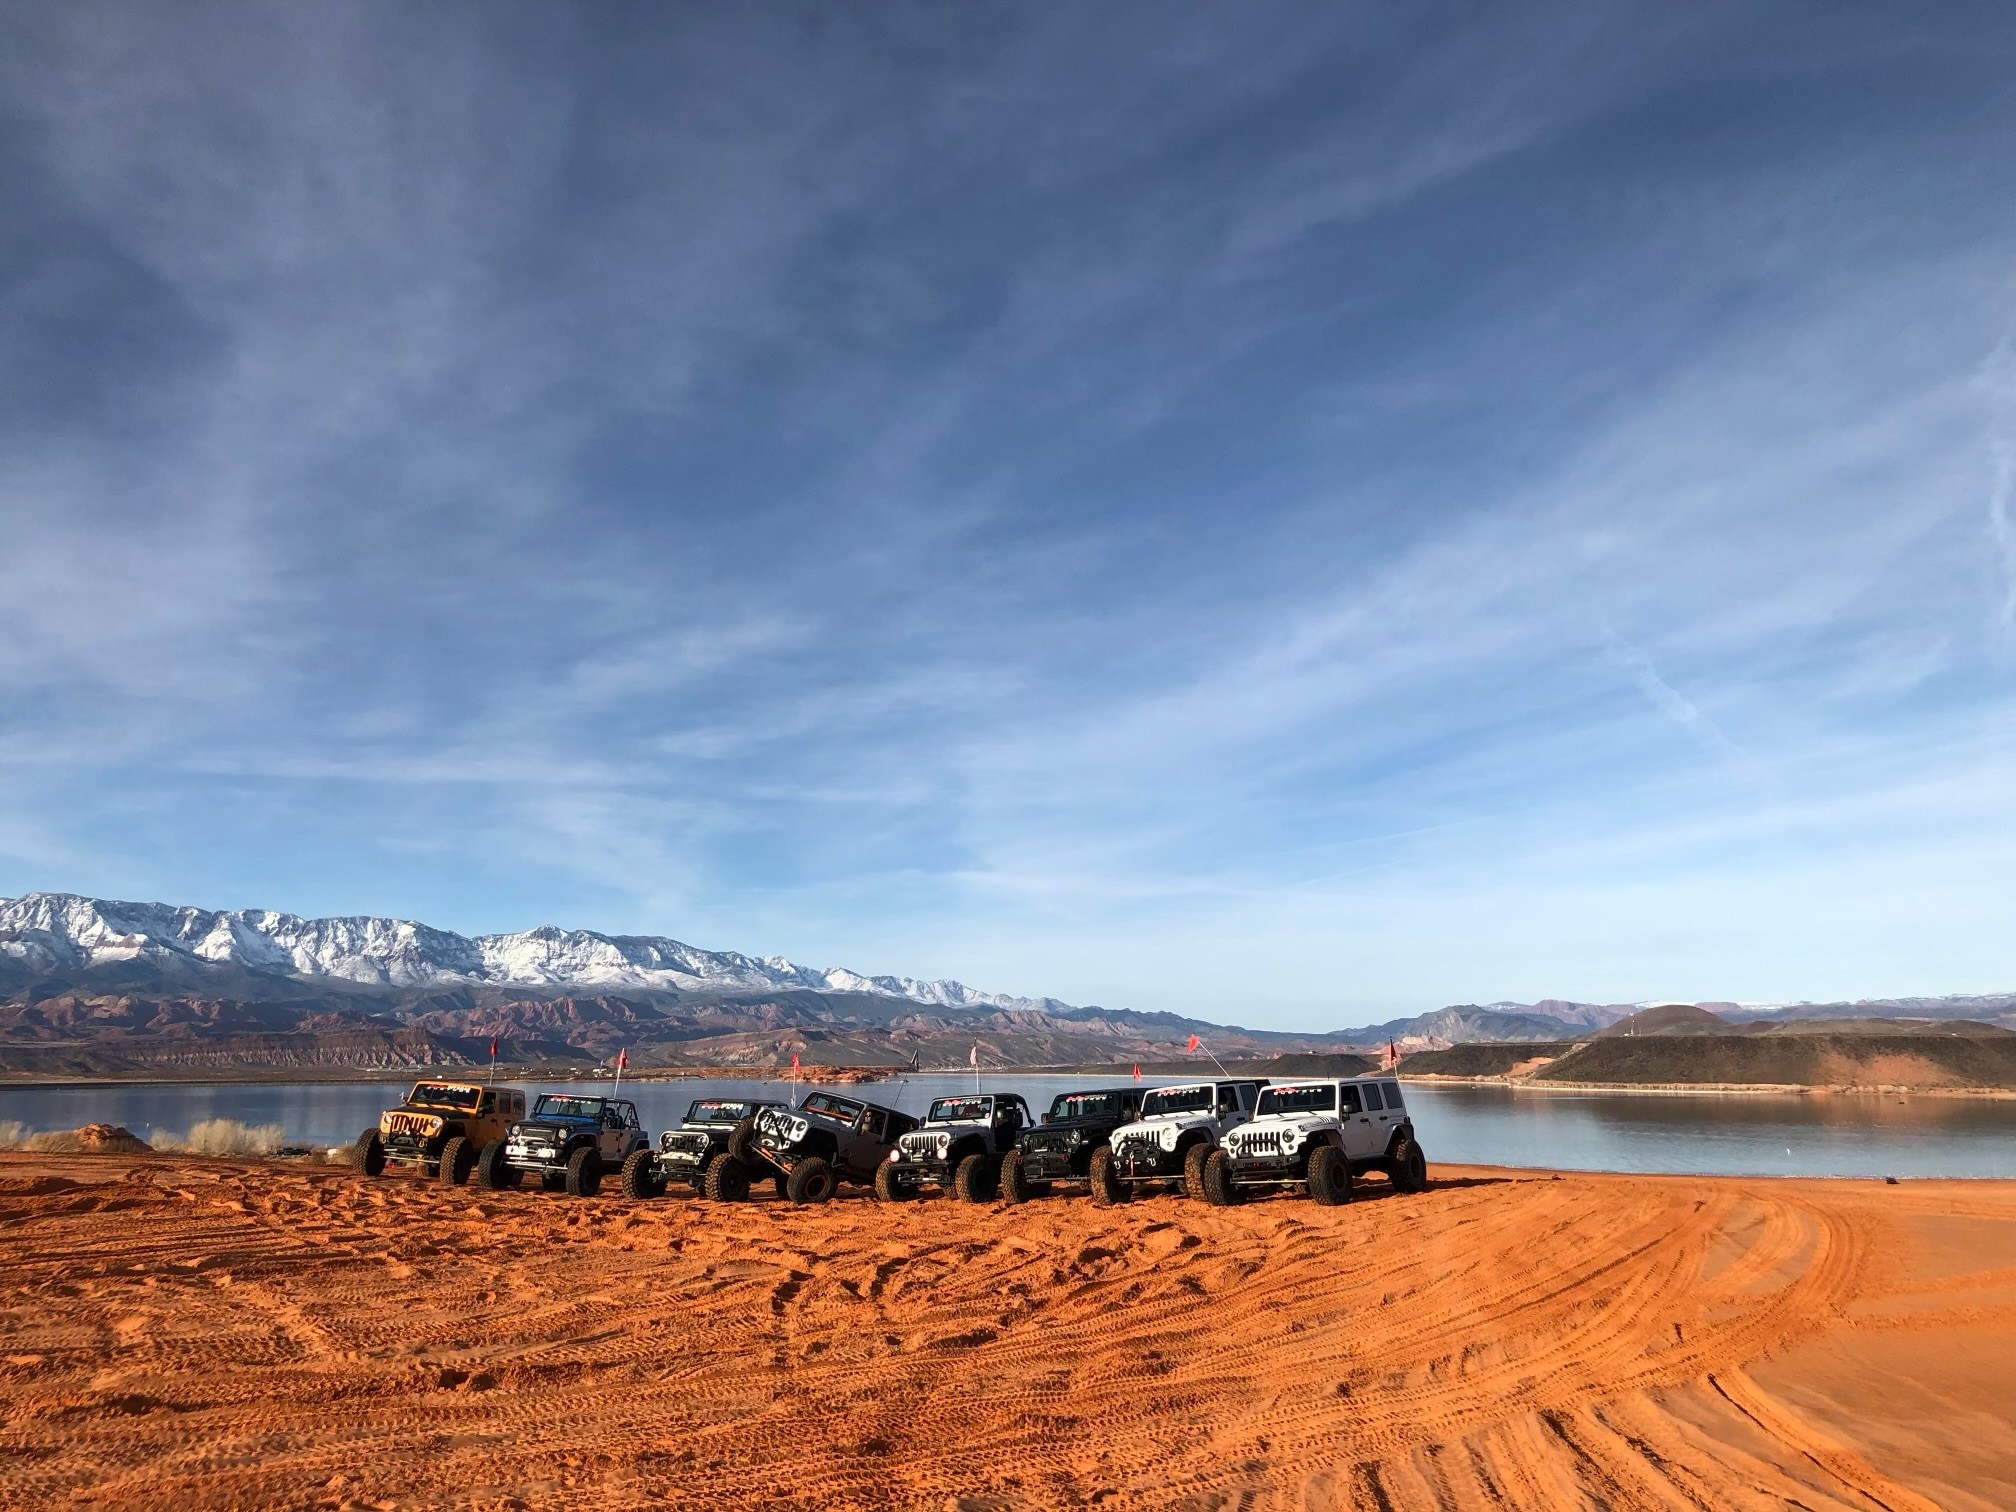
Spent $100,000 Modifying My Jeep Wrangler JKU. Here’s Why I’d Never Do It Again.
From a 2.5-inch lift and 33-inch tires to 40-inch Nittos, one-ton axles, custom suspension, and a Sprintex supercharger. Four and a half years of upgrades taught me one very expensive lesson.
Category: Garage | Jeep Wrangler JKU Builds
The Most Expensive Modification Was Always the Next One
I didn’t wake up one morning and decide to spend $100,000 modifying my Jeep Wrangler Unlimited Rubicon.
That would’ve been ridiculous.
No, I did something far more financially sophisticated.
I spent four and a half years upgrading my Jeep, replacing those upgrades, selling the old parts, and using the proceeds to purchase even more expensive upgrades.
See? Completely different.
It started with a modest 2.5-inch lift, some slightly larger tires, a front bumper, and a winch.
Nothing crazy.
Just a Jeep that looked a little better, sat a little higher, and could handle some weekend off-roading while remaining my daily driver.
And then I discovered rock crawling.
That was the beginning of the end.
Over the next four and a half years, my JKU went through multiple suspension systems, three major tire-size stages, axle reinforcement, regearing, forced induction, and eventually a complete one-ton axle and custom suspension transformation.
By the time I finished, I had a 6,200-pound Jeep on 40-inch tires, powered by a Sprintex supercharger, averaging nine miles per gallon.
And yes, I was still making payments on the damn Jeep itself.
Looking back, I don’t regret discovering rock crawling. I don’t regret learning about suspension geometry, drivetrain engineering, or the satisfaction of overcoming an obstacle that once seemed impossible.
But would I build another daily-driven Jeep this way?
Not a fucking chance.
Here’s how a perfectly reasonable set of modifications turned into a six-figure education.
⸻
Stage 1: The Innocent Beginning — Teraflex and Toyo Tires
Every expensive Jeep build begins with a perfectly reasonable justification.
Mine was simple: I wanted a little more ground clearance and better off-road capability.
The first upgrades were relatively modest:
2.5-inch Teraflex lift springs
285/70R17 Toyo R/T tires
Aftermarket wheels
LoD short front bumper
Warn winch
This was a sensible setup for a daily-driven Wrangler.
The tires were approximately 33 inches in diameter, the suspension provided additional clearance, and the winch gave me recovery capability.
Nothing about this configuration required transforming the Jeep into a dedicated rock crawler.
I could drive to work, take it on trails, and enjoy the vehicle without making extraordinary compromises.
Then I started exploring more technical terrain.
And something happened.
I realized that driving over rocks was considerably more entertaining than driving around them.
Apparently, that’s all it takes to turn a responsible adult into a walking aftermarket parts catalog.
⸻
Stage 2: The Rock-Crawling Bug — MetalCloak and 37-Inch Tires
Once I got hooked on rock crawling, the modest Teraflex setup wasn’t going to satisfy me forever.
The Jeep received a 3.5-inch MetalCloak short-arm suspension system.
The 285 Toyos were replaced with 37-inch Cooper tires mounted on 17-inch KMC beadlock wheels.
Now we were getting somewhere.
The larger tires improved obstacle clearance, while the MetalCloak suspension offered greater capability for the kind of terrain I was beginning to enjoy.
But bigger tires introduce additional stresses.
The factory Dana 44 front axle wasn’t magically designed to handle every modification I could dream up.
So I reinforced it with a truss and C-gussets.
I also installed Yukon 4.88 gears to better accommodate the larger tires.
Then came additional protection and equipment:
Rock Hard 4x4 skid plate system
Rock Hard 4x4 bolt-in cage
Bestop Trektop Pro
Each modification had a purpose.
The skid plates protected vulnerable components.
The cage added supplemental structure.
The gearing helped compensate for the tire-size increase.
And that’s precisely what made the spending so easy to justify.
Every purchase solved a problem created by the direction the build was taking.
I wasn’t buying random accessories.
I was making what seemed like logical improvements.
Unfortunately, logical improvements can still produce a financially illogical outcome.
⸻
Stage 3: The 40-Inch Tire Escalation
Eventually, 37-inch tires weren’t enough.
Yes, you read that correctly.
Thirty-seven-inch tires.
Not enough.
So I moved to 40-inch Milestar tires.
The Jeep also received GenRight aluminum fenders and eventually GenRight steel rock sliders.
And naturally, the suspension needed to evolve again.
The 3.5-inch springs gave way to 4.5-inch springs.
The MetalCloak short-arm configuration was replaced with a long-arm setup, including rear drop brackets.
Now the Jeep was entering a different category.
Forty-inch tires aren’t simply bigger versions of 33s.
They introduce substantial additional rotational mass and leverage on drivetrain and steering components.
They affect acceleration, braking, gearing, suspension clearance, and everyday road manners.
But off-road?
The increased tire diameter and obstacle clearance were hard to ignore.
The Jeep was becoming more capable.

And I was becoming increasingly skilled at explaining to myself why the next modification was absolutely necessary.
⸻
Stage 4: The Suspension Arms Race
By this point, I had developed a serious interest in suspension performance.
And when you’re crawling over rocks, articulation and suspension control matter.
The Jeep eventually received Locked Offroad 2.5-inch triple-bypass shocks, front and rear, with 12 inches of travel.
The springs grew again, this time to 5.5 inches.
Think about that progression.
I started with 2.5-inch Teraflex springs.
Then came the MetalCloak short-arm system.
Then long arms and taller springs.
Then triple-bypass shocks.
And none of those would ultimately remain the final suspension configuration.
That’s one of the most expensive lessons in modifying a vehicle without a clearly defined end goal.
You don’t simply pay for the suspension you end up with.
You pay for every suspension system you install along the way.
And while you may recover some money by selling the old components, installation costs, depreciation, and the price difference between old and new parts don’t disappear.
At the time, I wasn’t thinking about cumulative costs.
I was thinking about the next trail.
⸻
Stage 5: The Sprintex Supercharger — Because Why Not?
Somewhere along the way, my increasingly heavy JKU needed more power.
Or at least that’s what I told myself.
Enter the Sprintex twin-screw supercharger.
A forced-induction system on a Jeep running 40-inch tires.
Perfectly normal behavior.
To be fair, the decision had a technical rationale.
Larger tires, heavier drivetrain components, and additional vehicle weight all place greater demands on the powertrain.
The Sprintex was intended to improve the Jeep’s power delivery.
But adding forced induction also meant introducing additional mechanical complexity and thermal demands.
Eventually, the Jeep received a Griffin radiator.
And here we see the recurring theme of this entire build.
Bigger tires led to drivetrain upgrades.
Additional weight encouraged a power upgrade.
More power brought cooling considerations.
The Jeep wasn’t simply accumulating parts.
It was becoming a collection of interconnected systems that all needed to work together.
Every solution seemed to introduce another opportunity to spend money.
We’ll cover the engine, transmission, Sprintex performance, cooling, and real-world drivability in a dedicated technical article.
Because there’s considerably more to discuss than simply saying I installed a supercharger.
⸻
Stage 6: The One-Ton Axle Conversion — Fusion 4x4
Eventually, I reached the point where I wanted a much stronger axle package.
The reinforced factory Dana 44 had served its purpose, but the direction of the build demanded something more substantial.
Enter Fusion 4x4.
The front axle was replaced with a Fusion Kingpin Dana 60.
The rear received a Fusion 14-bolt.
Both axles were configured at 72 inches WMS-to-WMS, giving the Jeep a seriously wide stance.
The final drivetrain configuration included:
Fusion Kingpin Dana 60 front axle
Fusion 14-bolt rear axle
5.13 gears
ARB air lockers
Yukon locking hubs
JE Reel 1350 driveshafts front and rear
KMC beadlock wheels
40-inch Nitto tires
I also installed PSC hydraulic steering assistance with custom steering components.
This was no longer a mildly lifted daily driver.
It was serious rock-crawling hardware.
The selectable ARB lockers provided traction when needed, while the axle assemblies offered the strength appropriate for a heavily modified vehicle running 40-inch tires.
The 5.13 gears helped address the gearing demands of the larger tires.
And the PSC system assisted with steering loads that would have been considerable with this setup.
From an engineering standpoint, the transformation was impressive.
From a financial standpoint?
Let’s just say my bank account was probably hoping I’d discover a less expensive hobby.
Like yacht racing.
⸻
Stage 7: The Final Suspension — Custom Links and Fox Coilovers
After the Fusion axle swap, I eventually committed to a fully custom suspension.
The front received a custom three-link arrangement.
The rear received a double-triangulated four-link.
The control arms were fabricated from 7075-T6 aluminum.
The Jeep ran AccuTune-tuned Fox 2.5-inch coilovers with Eibach springs.
Front travel: 12 inches.
Rear travel: 14 inches.
The custom suspension was designed to provide substantial articulation and control over difficult terrain.
The double-triangulated rear geometry located the axle through the links rather than relying on a conventional track-bar arrangement.
This was serious fabrication and suspension engineering.
And when everything worked together, the Jeep was spectacular.
But here’s the absurd part.
By the time I reached this configuration, I had already purchased, installed, used, and replaced multiple previous suspension systems.
The original Teraflex springs were long gone.
So were the MetalCloak short arms.
And the later long-arm configuration.
And the triple-bypass shock setup.
I had effectively built several different Jeeps underneath the same body.
The final suspension was impressive.
The path I took to get there was extraordinarily expensive.
⸻
The Great Jeep Parts Recycling Program
Now, before you assume I just threw perfectly good parts into a dumpster every time I upgraded, let me clarify something.
I sold them.
See?
Financial responsibility.
Well, sort of.
Because every dollar I recovered went straight back into the Jeep.
I’d sell a suspension system to help pay for another suspension system.
I’d sell tires to help purchase bigger tires.
I’d sell components that were still perfectly functional because I’d decided I needed something more capable.
And somehow, I convinced myself that using the proceeds from those sales made the next purchases financially responsible.
Except I wasn’t saving money.
I was simply reducing how much additional money I needed to spend.
The proceeds never went into savings.
They never went toward paying off the vehicle.
They never reduced my existing debt.
They went straight back into the Jeep.
I wasn’t losing money on Jeep parts. I was transferring it from one questionable financial decision to the next.
Wall Street might call that capital reinvestment.
My credit card company probably called it customer loyalty.
I call it the world’s most expensive recycling program.
⸻
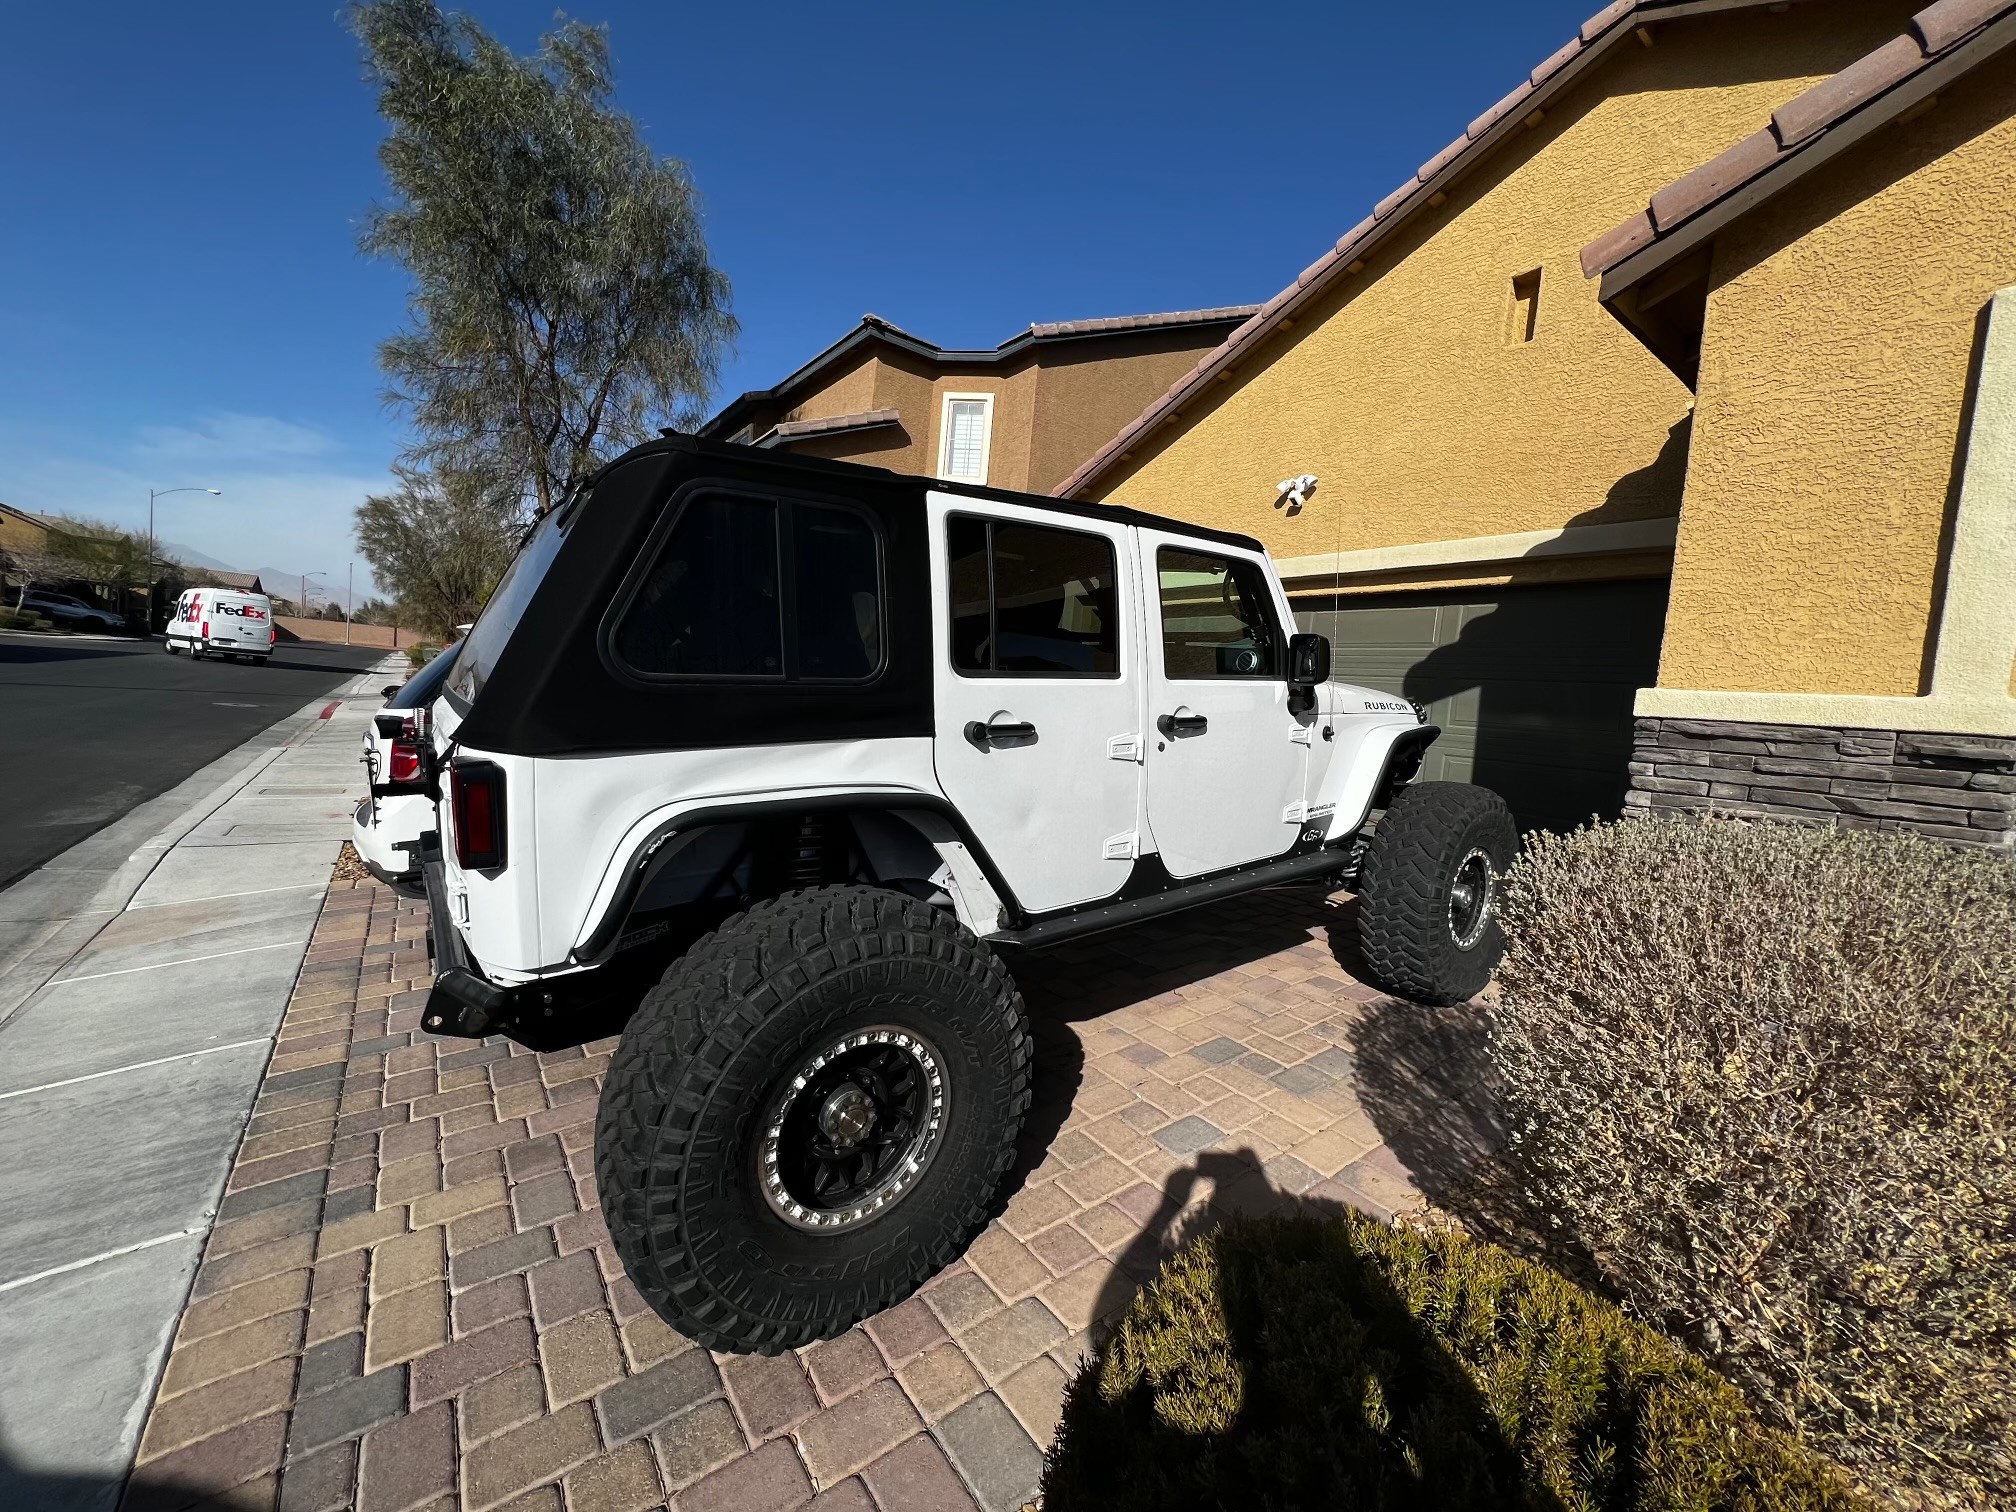
The Finished Jeep: 6,200 Pounds, 40-Inch Nittos, and Nine MPG
By the end of the build, the JKU weighed approximately 6,200 pounds.
It had a Sprintex supercharger, Fusion one-ton axles, custom suspension, Fox coilovers, PSC steering, and 40-inch Nitto tires.
Additional equipment included:
Rock Hard 4x4 bolt-in cage
GenRight aluminum fenders
GenRight steel sliders
GenRight 25-gallon fuel tank
Barnes 4WD front and rear bumpers
Warn VR 12,000-pound winch
Rigid auxiliary lighting
Griffin radiator
And despite the upgraded 25-gallon fuel tank, the Jeep averaged approximately nine miles per gallon in combined driving.
Nine.
At $4 per gallon, that works out to roughly 44 cents per mile in gasoline.
Drive 12,000 miles annually, and you’re spending approximately $5,333 on fuel alone.
The theoretical range from a 25-gallon tank was approximately 225 miles, although actual usable range would be lower with a sensible fuel reserve.
I built a Jeep that could go almost anywhere. Unfortunately, I couldn’t afford to go very far.
And fuel wasn’t even the most expensive part of ownership.
⸻
What Was Actually Worth the Money?
Here’s where I want to make an important distinction.
I don’t consider every modification a mistake.
Far from it.
The build taught me a tremendous amount about suspension design, gearing, steering, drivetrain strength, and the relationship between vehicle modifications.
The problem wasn’t necessarily the quality of the parts.
It was the lack of a clearly defined final goal.
The modifications that made technical sense
One-ton axles: Given the eventual 40-inch tires and serious rock-crawling ambitions, the Fusion axle package was consistent with the vehicle’s intended capability.
Custom suspension: The final three-link and double-triangulated four-link configuration was designed around the kind of off-road performance I wanted.
Hydraulic steering assistance: With massive tires and heavy-duty axles, steering assistance addressed a real functional demand.
Skid plates, sliders, and recovery equipment: These were practical additions for the terrain I enjoyed.
What I would approach differently
Repeated suspension purchases: Rather than progressing through multiple lift heights and configurations, I would define the end goal much earlier.
Repeated tire upgrades: Moving from approximately 33-inch tires to 37s, then 40-inch Milestars, and eventually 40-inch Nittos meant repeatedly investing in tire and wheel configurations.
Powertrain modifications on a daily driver: The Sprintex added capability, but it also increased complexity on a vehicle I depended on for everyday transportation.
The overall vehicle strategy: Most importantly, I would separate my daily transportation from my dedicated off-road machine.
This isn’t a definitive ranking of every component I installed.
It’s a reflection on how the build evolved and where I believe the money could have been spent more efficiently.
⸻
The Real Cost of Building a Jeep Without an End Goal
Over approximately four and a half years, I spent close to $100,000 on parts and labor throughout the Jeep’s evolution.
That wasn’t the cost of the final configuration alone.
It reflected years of upgrades, replacement components, fabrication, and installation work.
I also sold equipment along the way and reinvested the proceeds, so that figure should be understood as an approximate cumulative build-spending estimate rather than a verified net-loss calculation.
And it doesn’t include the original vehicle purchase price.
Which brings me to the most embarrassing part.
I was still financing the Jeep while spending all that money modifying it.
The monthly payment didn’t disappear when I installed the Dana 60.
The insurance didn’t disappear when I added the supercharger.
And the maintenance costs certainly didn’t decrease as the vehicle became more complex.
That’s when the real financial lesson becomes clear.
You can make technically sensible modifications and still end up making a financially terrible decision.
Especially when there’s no clearly defined finish line.
⸻
The Mechanical Headaches Nobody Shows on Instagram
There’s another side to extreme Jeep builds that rarely makes it into the glamorous photographs.
Reliability.
Or more specifically, the challenges of maintaining a heavily modified vehicle that you depend on every day.
When you’re running custom suspension geometry, one-ton axles, hydraulic steering assistance, aftermarket cooling, and forced induction, you’re dealing with a vehicle that no longer operates as a complete factory-engineered package.
That doesn’t mean custom vehicles are inherently unreliable.
But troubleshooting can become more complicated.
And when something goes wrong, the solution isn’t always as simple as dropping the Jeep off at a dealership.
The dealership didn’t design your custom three-link suspension.
It didn’t fabricate your aluminum control arms.
And it certainly didn’t engineer your exact combination of axle assemblies, steering components, coilovers, and supercharger.
For a dedicated recreational vehicle, that’s part of the hobby.
For your daily driver?
It gets old.
And after years of dealing with the mechanical compromises, I eventually realized I’d been trying to make one vehicle do two completely different jobs.
⸻
What I Should Have Done: Buy a Truck and Build a Buggy
If I could go back and start over, I’d take an entirely different approach.
I’d buy a truck and build a dedicated rock-crawling buggy.
The truck would handle daily transportation.
Comfort.
Practicality.
Towing.
And a far more conventional ownership experience.
The buggy would be built specifically for the trails.
No need to compromise suspension design for everyday highway use.
No need to make a dedicated rock crawler comfortable enough for commuting.
No need to rely on a heavily modified off-road vehicle to get me to work.
Would a truck, trailer, and buggy necessarily be inexpensive?
Absolutely not.
But I’d be spending money on two vehicles designed for different purposes instead of trying to make one machine excel at everything.
And perhaps more importantly, I could plan the buggy’s final configuration before purchasing the first major component.
Rather than buying three suspension systems on the way to the one I actually wanted.
⸻
Six Lessons I’d Give Anyone Planning a Serious Jeep JKU Build
1. Define the mission before modifying anything
Is your Jeep a daily driver, weekend trail rig, overlanding vehicle, or dedicated rock crawler?
Those goals require different compromises.
2. Build toward a final configuration
If you already know you want one-ton axles and 40-inch tires, think carefully before spending heavily on intermediate components you may replace.
3. Budget for the entire supporting system
Bigger tires may require more than just bigger wheels.
Consider gearing, steering, axle strength, braking, suspension geometry, and drivetrain demands.
4. Understand that selling old parts doesn’t erase their cost
Resale proceeds can reduce the expense of the next purchase.
They don’t make the previous purchase free.
5. Consider daily-driver compromises
Fuel economy, maintenance, reliability, tire wear, insurance, and downtime all matter.
Especially if the Jeep is your primary transportation.
6. Learn when to stop
There’s always another upgrade.
Another component.
Another trail.
Another reason to spend money.
Eventually, you have to decide whether you’re improving the vehicle for a specific purpose or simply modifying it because you enjoy modifying it.
Neither motivation is inherently wrong.
But they have very different financial consequences.
⸻
Would I Build Another $100,000 Jeep?
No.
Absolutely not.
And that’s not because I didn’t enjoy the experience.
I did.
The finished Jeep was an incredibly capable machine.
The Fusion axles, custom suspension, Fox coilovers, PSC steering, 40-inch Nittos, and Sprintex supercharger made for one hell of a build.
I learned a tremendous amount.
I enjoyed the technical challenges.
And I had a lot of fun.
But I also learned that modifying a daily driver into an extreme rock crawler comes with financial and mechanical compromises that I wouldn’t willingly repeat.
If I could do it again, I’d buy a truck, build a buggy, and leave my everyday transportation alone.
Because after four and a half years and approximately $100,000 in modifications, I finally figured something out.
The most expensive modification wasn’t the supercharger, the axles, or the suspension.
It was the next modification.
And then the next one.
And the one after that.
Unfortunately, that lesson wasn’t included in any of the installation manuals.
— The Evil Daddy
⸻
Explore the Full Jeep JKU Build Series
This article tells the story of how the Jeep evolved. The following technical deep dives explore the individual systems, what worked, and what I’d do differently.
Part 1: Jeep JK Sprintex Supercharger Review — Engine, Transmission, and Real-World Performance
How the twin-screw supercharger affected drivability, power delivery, cooling, and the demands of a heavily modified JKU.
Part 2: Jeep JKU Suspension Evolution — From MetalCloak to Custom Fox Coilovers
Teraflex springs, MetalCloak short arms and long arms, Locked Offroad triple-bypass shocks, and the final custom three-link and double-triangulated four-link suspension.
Part 3: Jeep JKU Dana 60 and 14-Bolt Axle Swap — Fusion 4x4, ARB Lockers, and PSC Steering
Why I moved beyond the factory Dana 44, how the one-ton conversion came together, and what the 5.13 gears and hydraulic steering brought to the build.
Part 4: 33s vs. 37s vs. 40s on a Jeep JKU — What I Learned
From Toyo R/Ts to Cooper 37s, Milestar 40s, and Nitto 40s: traction, clearance, road manners, gearing, and the cost of continually going bigger.
These technical articles are part of the planned Garage series. Links will be added as each article is published.
⸻
Related Reading From The Evil Daddy Money Section
Debt Consolidation Without the Bullshit: How to Escape Credit Card Debt Without Getting Burned
Wondering how someone manages to spend approximately $100,000 modifying a vehicle they’re still making payments on?
Excellent question.
I recommend reading our debt consolidation guide.
The author has extensive firsthand experience with questionable financial decisions.
You’re welcome. 😈
Join the Conversation
Comments are not active yet.
KEEP READING
EXPLORE THE EVIL DADDY
Dad Life • Travel • Money • Garage • Fitness • Photography • Evil Baby Lore
About • Contact • Privacy • Disclosure • Gear